CS 180 Project 2 - Fun with filters and Frequencies by Eshani Jha

Overview

In this project, I explored various techniques for image filtering and frequency manipulation to better understand how images can be processed and enhanced. I started by applying the Finite Difference Operator to compute gradients and edges, and then improved the results using a Derivative of Gaussian (DoG) filter to reduce noise. I also experimented with sharpening images through unsharp masking, which helped me see how adding high-frequency details can make images look crisper. Next, I created hybrid images by blending high and low frequencies from different images to produce unique, distance-dependent effects. Finally, I implemented Gaussian and Laplacian stacks for multiresolution blending, combining two images smoothly, including experimenting with irregular masks. This project gave me hands-on experience with key concepts in computer vision, including convolution, filtering, and frequency-based image analysis.

Finite Difference Operator

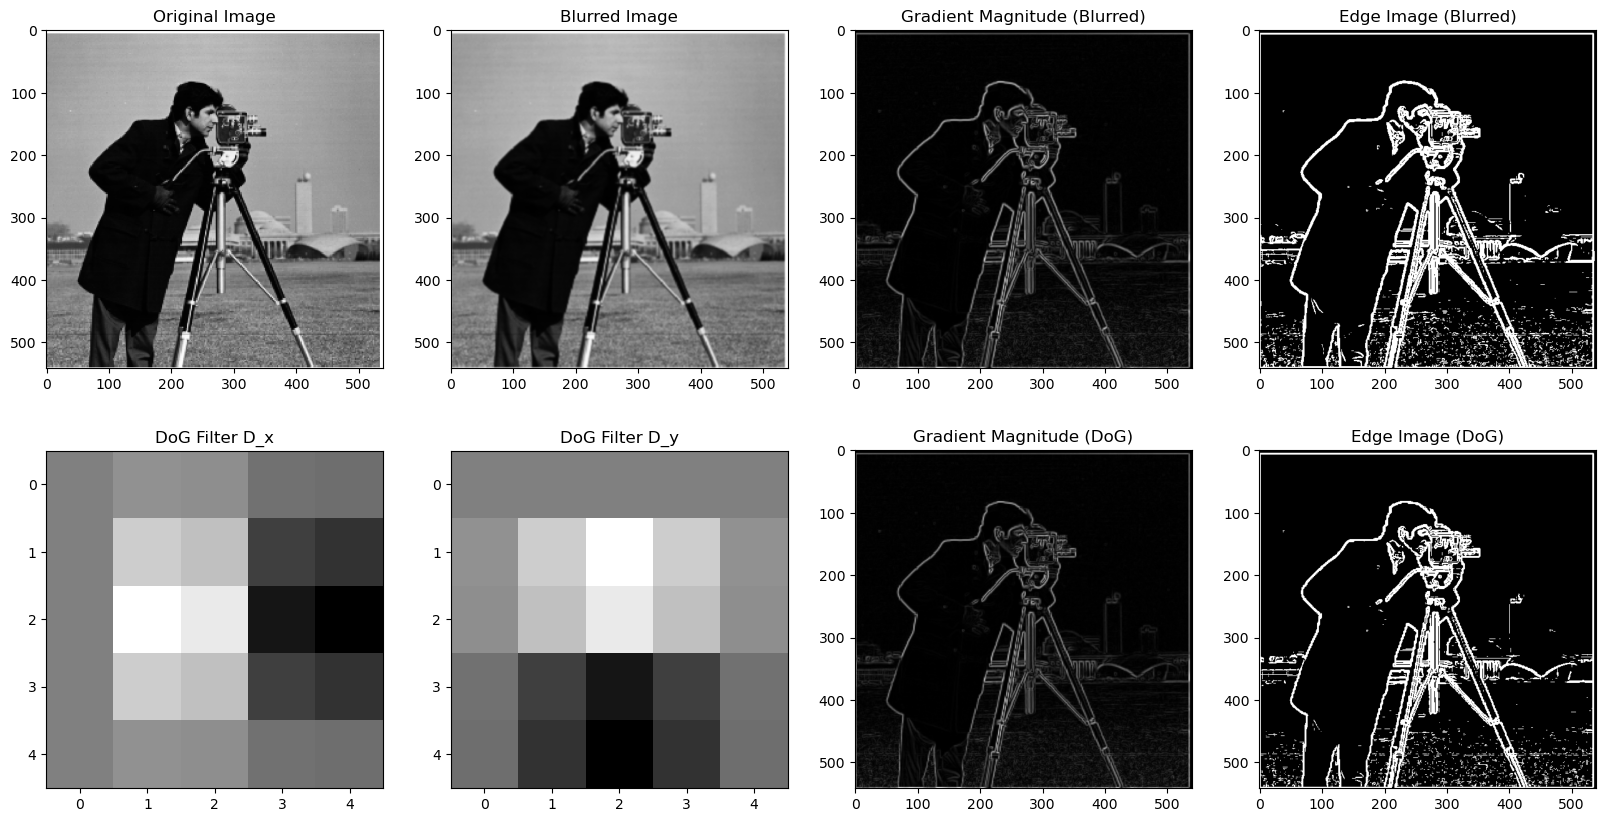
To compute the gradient magnitude of an image, I first applied finite difference operators in both the x and y directions. This involved convolving the image with the respective operators, Dx and Dy, which allowed me to capture the partial derivatives in both directions. After obtaining the gradients in x and y, I calculated the gradient magnitude at each pixel using the formula √(Dx2 + Dy2), which combines the two directional derivatives. To create a clear edge image, I then applied thresholding to the gradient magnitude, adjusting the threshold to highlight the true edges while minimizing noise.

Results

Result Cameraman Gradient Image

Derivative of Gaussian (DoG) Filter

When applying the finite difference operator alone, I noticed the results were unclear. Fortunately, we can use a Gaussian filter to smooth the image and reduce this noise. By convolving the original image with a Gaussian filter, I created a blurred versio. Then, I repeated the same gradient magnitude computation as before. To create a 2D Gaussian filter, I used cv2.getGaussianKernel() to generate a 1D Gaussian and take the outer product with its transpose to form a 2D kernel. After applying this blur, the noise is significantly reduced. We can simplify the process further by combining the Gaussian filter with the finite difference operators Dx and Dy, creating Derivative of Gaussian (DoG) filters. This allows us to achieve the same results using a single convolution, rather than two. The resulting DoG filters are displayed below.

Comparing the two methods, the DoG filters provide the same results but with cleaner and sharper edges, demonstrating the effectiveness of Gaussian smoothing in edge detection.

Results

Resulting Cameraman with Filter

Image "Sharpening"

Image sharpening is achieved through the unsharp mask technique, which enhances the high-frequency details of an image. The process begins by applying a Gaussian blur to the image (which acts as a low-pass filter), retaining only the low-frequency components. By subtracting this blurred version from the original image, we isolate the high frequencies, which are responsible for finer details.

To sharpen the image, we then add the scaled high-frequency components back to the original image. This increases the strength of the high frequencies, making the image appear crisper and more defined. The amount of sharpening can be controlled by scaling these high frequencies using a factor, typically referred to as alpha. This entire operation can be combined into a single convolution, known as the unsharp mask filter.

Results

I sharpened the image of the Taj Mahal using different sharpening intensities with alpha values of 1, 2, and 3. As the alpha increases, the edges of the image become more defined, and the architectural details of the building stand out more prominently, especially at the highest alpha value. This sharpening process mimics the techniques used in modern smartphone cameras to enhance image quality, making details clearer and crisper in photos.

Sharpening the Taj Mahal

Extra Results

For demonstration, I applied the unsharp mask technique to several images including flowers, water, and cows. In the case of the rose flowers, sharpening revealed intricate details such as wrinkles in the petals that were not noticeable before. Similarly, in the image of the cow, the sharpening made the individual blades of grass appear much crisper and more defined. However, for the image of water, the effect was minimal. This is likely due to the smoother nature of the surface, which lacks the fine details that benefit from sharpening.

Sharpening of Flower Image Sharpeniing of Cow Image Sharpeniing of Water Image

Hybrid Images with FFT

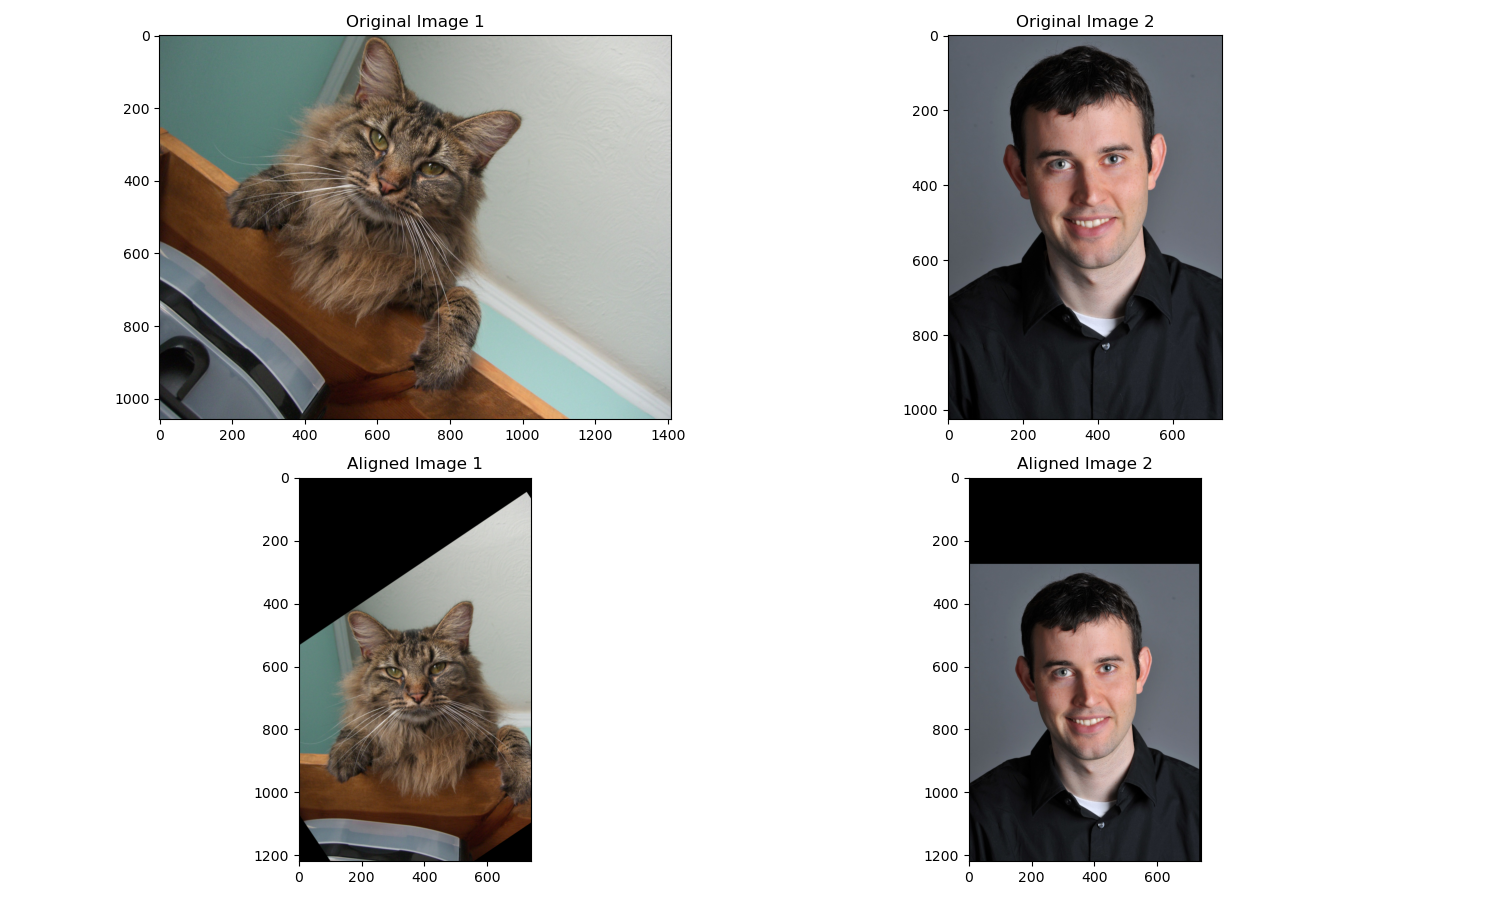
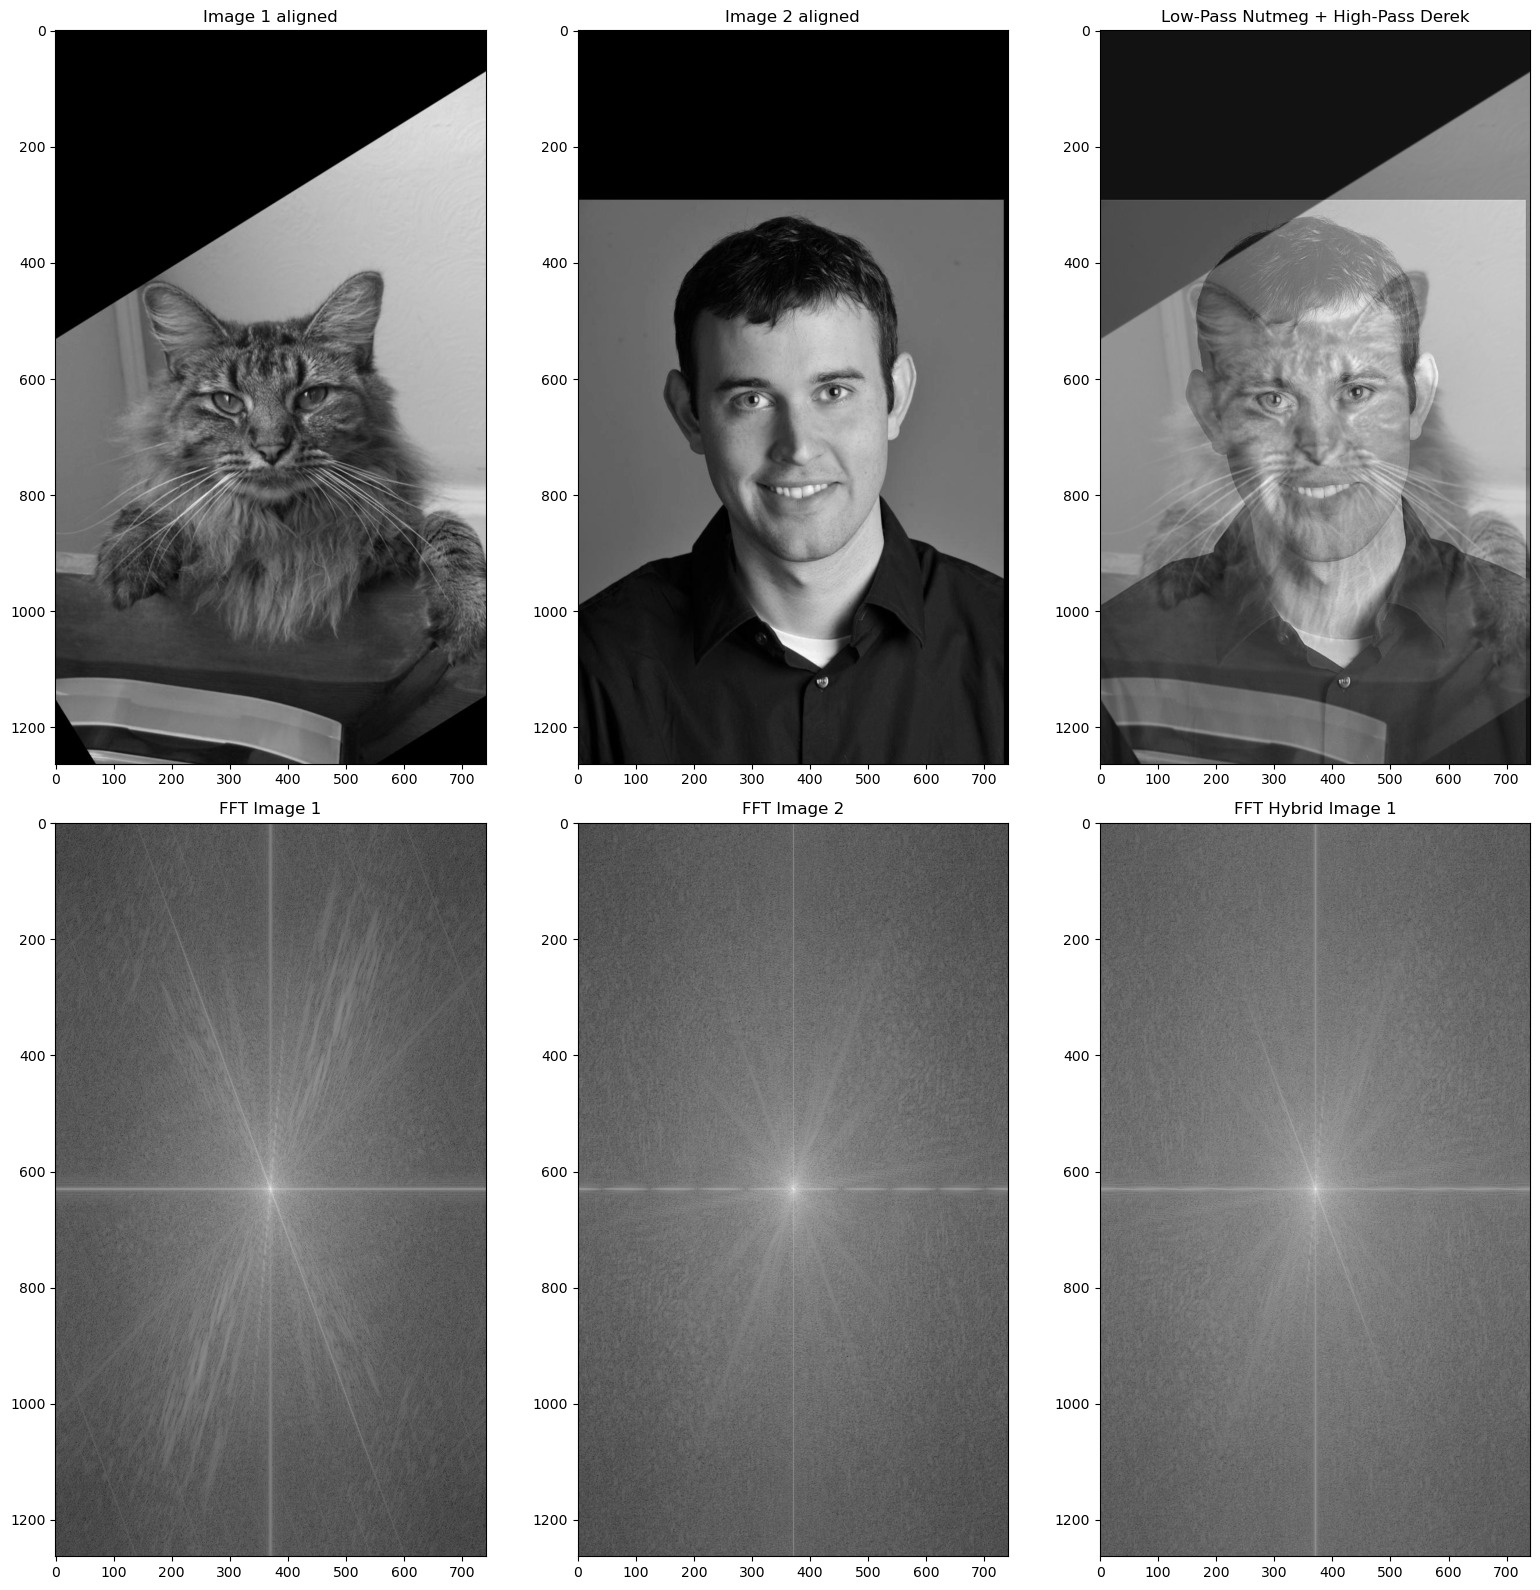
The goal here was to create hybrid images which change in interpretation depending on the viewing distance. This concept is based on the idea that high-frequency components dominate when viewed up close, while only the low-frequency components are visible from afar. By blending the high frequencies of one image with the low frequencies of another, we can create a hybrid image that shifts in perception as distance changes. To achieve this, I applied a low-pass Gaussian filter to one image to capture the low frequencies. For the second image, I again applied the low-pass filter and subtracted this from the original image to isolate the high frequencies in the second image. Below are examples where one image contributes its low frequencies while one image provides the high frequencies.

Results

Here we have Nutmeg, the cat, and Derek, the guy. By blending features from both images, we can explore how different aspects of each subject combine. This results in some intriguing visual effects.

Result Image Result Image

Successful Results

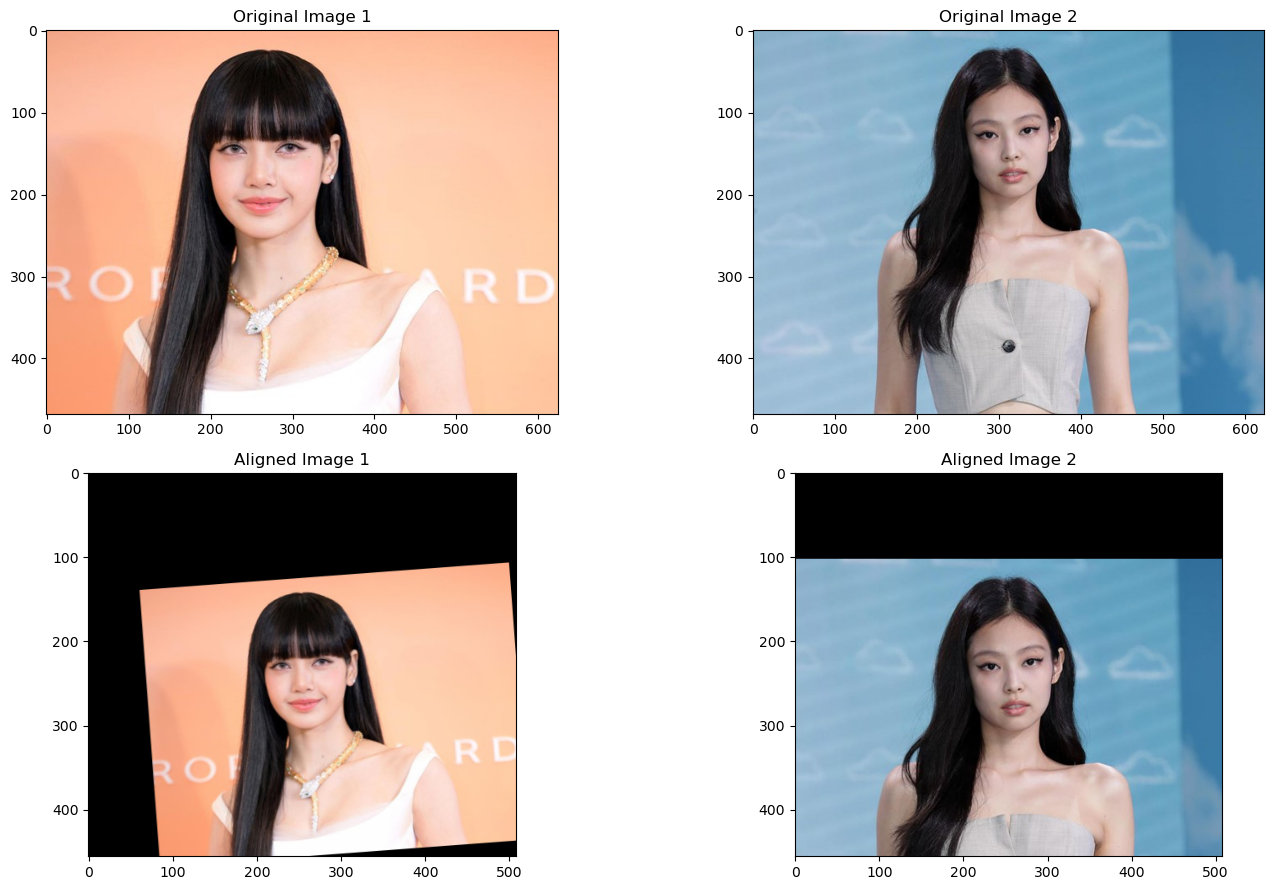
As an example, I blended two members of the BLACKPINK girl group: Jennie and Lisa. I applied a low-pass filter to Lisa’s image and a high-pass filter to Jennie’s image, creating a hybrid image that shifts in perception depending on the viewing distance. Up close, you can see Jennie’s high-frequency details, while from a distance, Lisa’s low-frequency features dominate.

Unsuccessful Result Image Unsuccessful Result Image Unsuccessful Result Image

Unsuccessful Results

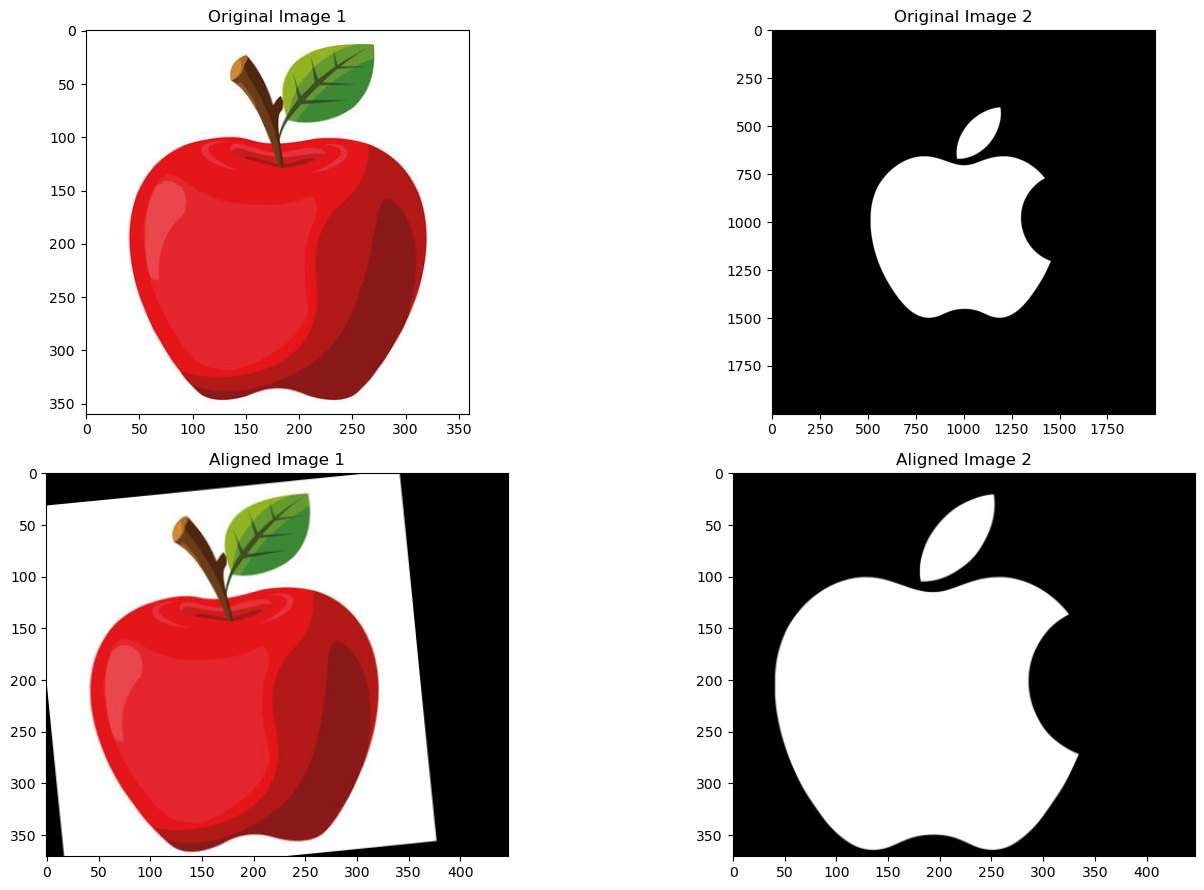
Another example I attempted was blending a red apple with the Apple logo, using the low frequencies of the apple and the high frequencies of the logo. However, this hybrid image didn't work as effectively due to the high contrast between the two images. The strong contrast in texture and shape made it difficult for the blending to produce a smooth transition, and the distinct edges of the Apple logo clashed with the smoother, organic structure of the red apple. As a result, the hybrid image lacked the seamless shift in perception seen in other examples.

Unsuccessful Result Image Unsuccessful Result Image Unsuccessful Result Image

Gaussian and Laplacian Stacks

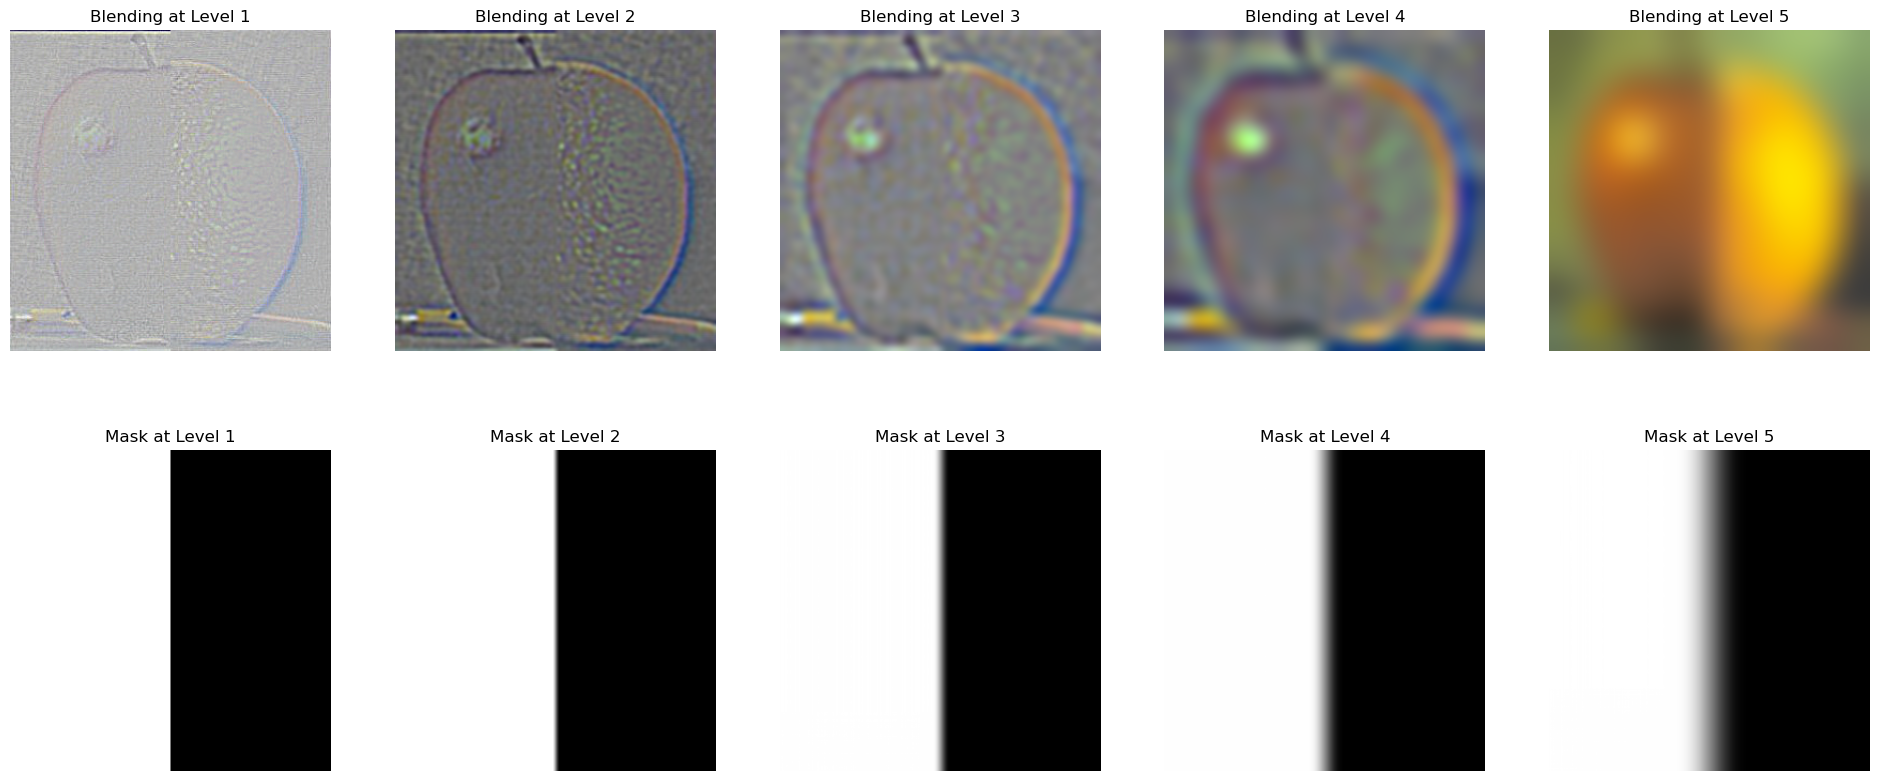
To create a Gaussian stack, I repeatedly convolved the original image with a Gaussian filter, progressively reducing the high frequencies with each successive level. This results in a stack where each image contains lower frequencies than the previous one. For the Laplacian stack, I calculated the difference between consecutive images in the Gaussian stack, creating a series of bandpass images. The final image in the Laplacian stack contains the lowest frequencies. When the images in the Laplacian stack are added back together, they reconstruct the original image. For all examples, I extend this process to color images by applying the method to each channel separately.

Unlike pyramids, Gaussian and Laplacian stacks do not involve downsampling, so each image remains the same size as the original. This allows us to preserve the image dimensions while processing each level of the stack. Below, I visualize the Gaussian and Laplacian stacks for the classic apple and orange blending example, which sets the foundation for multi-resolution blending in the next section.

Results

Gaussian and Laplacian Results Gaussian and Laplacian Results Gaussian and Laplacian Results Gaussian and Laplacian Results

Multiresolution Blending (a.k.a. the orapple!)

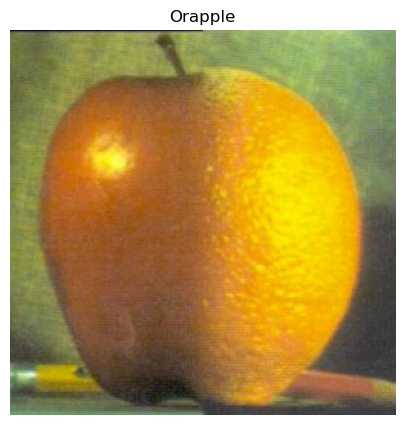
To blend images, such as in the "Orapple" example (a combination of an apple and an orange), we first need to create a Gaussian stack of the mask, which determines how the two images will be merged. Once we have the mask, we multiply each level of the Laplacian stacks for both images (apple and orange) by their corresponding levels of the mask to generate intermediate masked stacks. These intermediate stacks are then collapsed and summed to produce the final blended image. Below, I applied this process to recreate the outcomes shown in Figure 3.42 from Szelski. The masked stacks for both the apple and orange are visualized, followed by the resulting "Orapple" stack, and finally, the blended image.

Results

Mask for Orapple Orapple

Extra Results

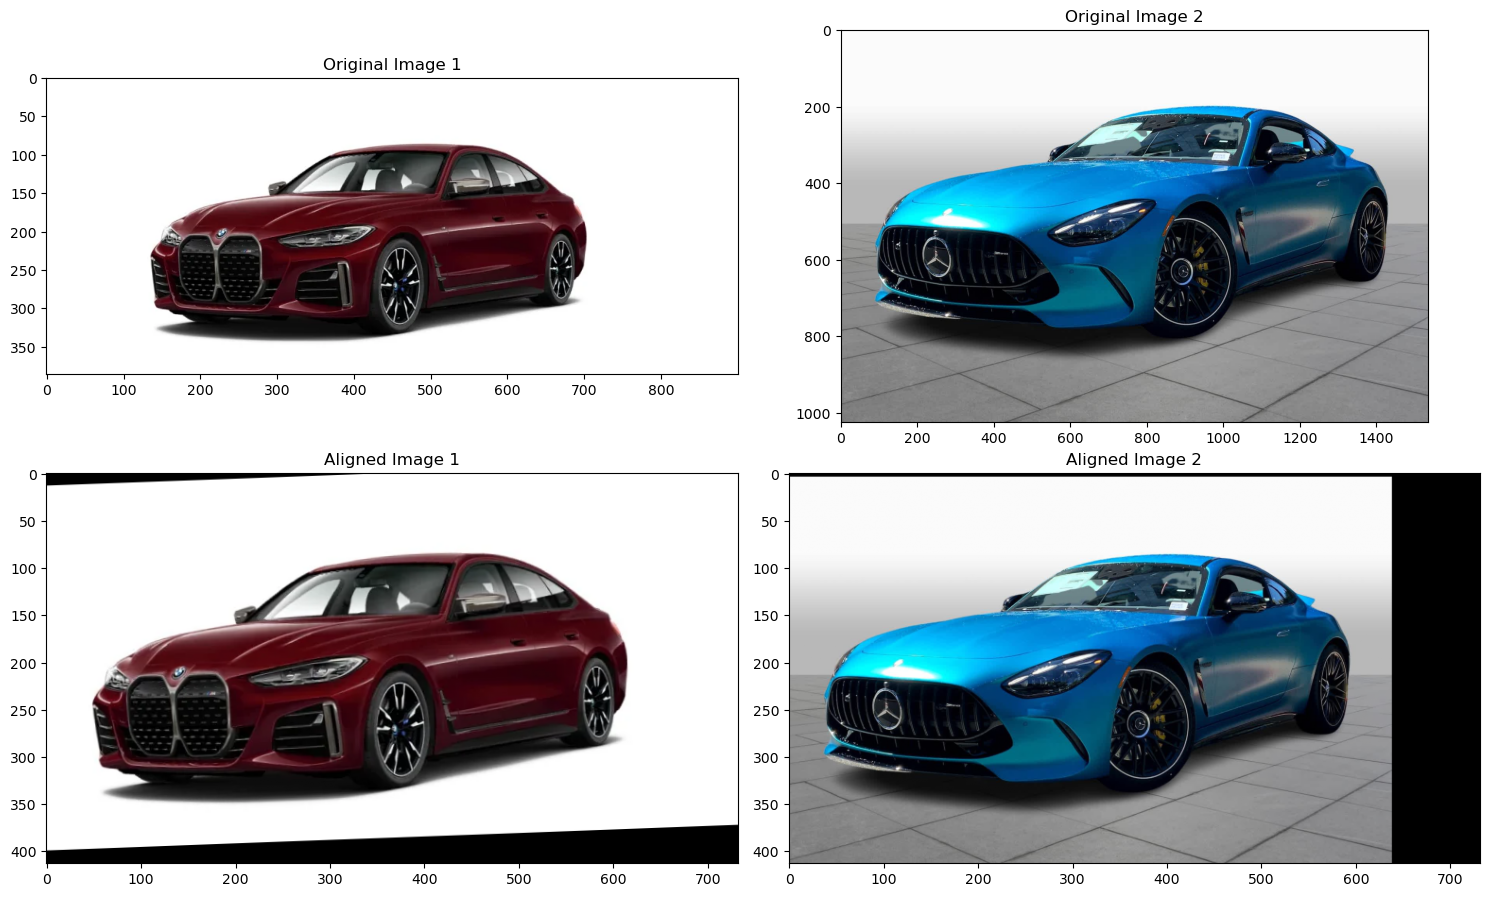
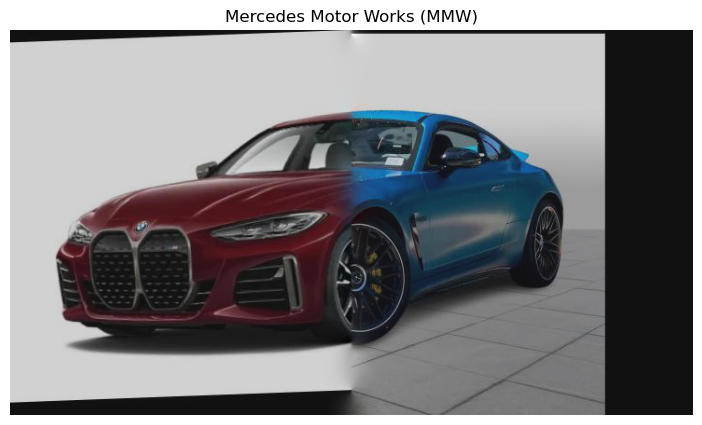
I applied the same blending technique to combine images of a BMW and a Mercedes, blending them down the middle. Since the images had different sizes and orientations, I first used align_image_code.py to align and resize them. I chose the car hood and wheel axle as alignment points. This step ensured that the bodies of both cars were properly aligned, allowing for a smooth transition at the seam. After alignment, the blending process effectively merged the two car images without noticeable distortions.

Mask for Orapple Orapple Orapple Orapple

Extra Results - Irregular Mask

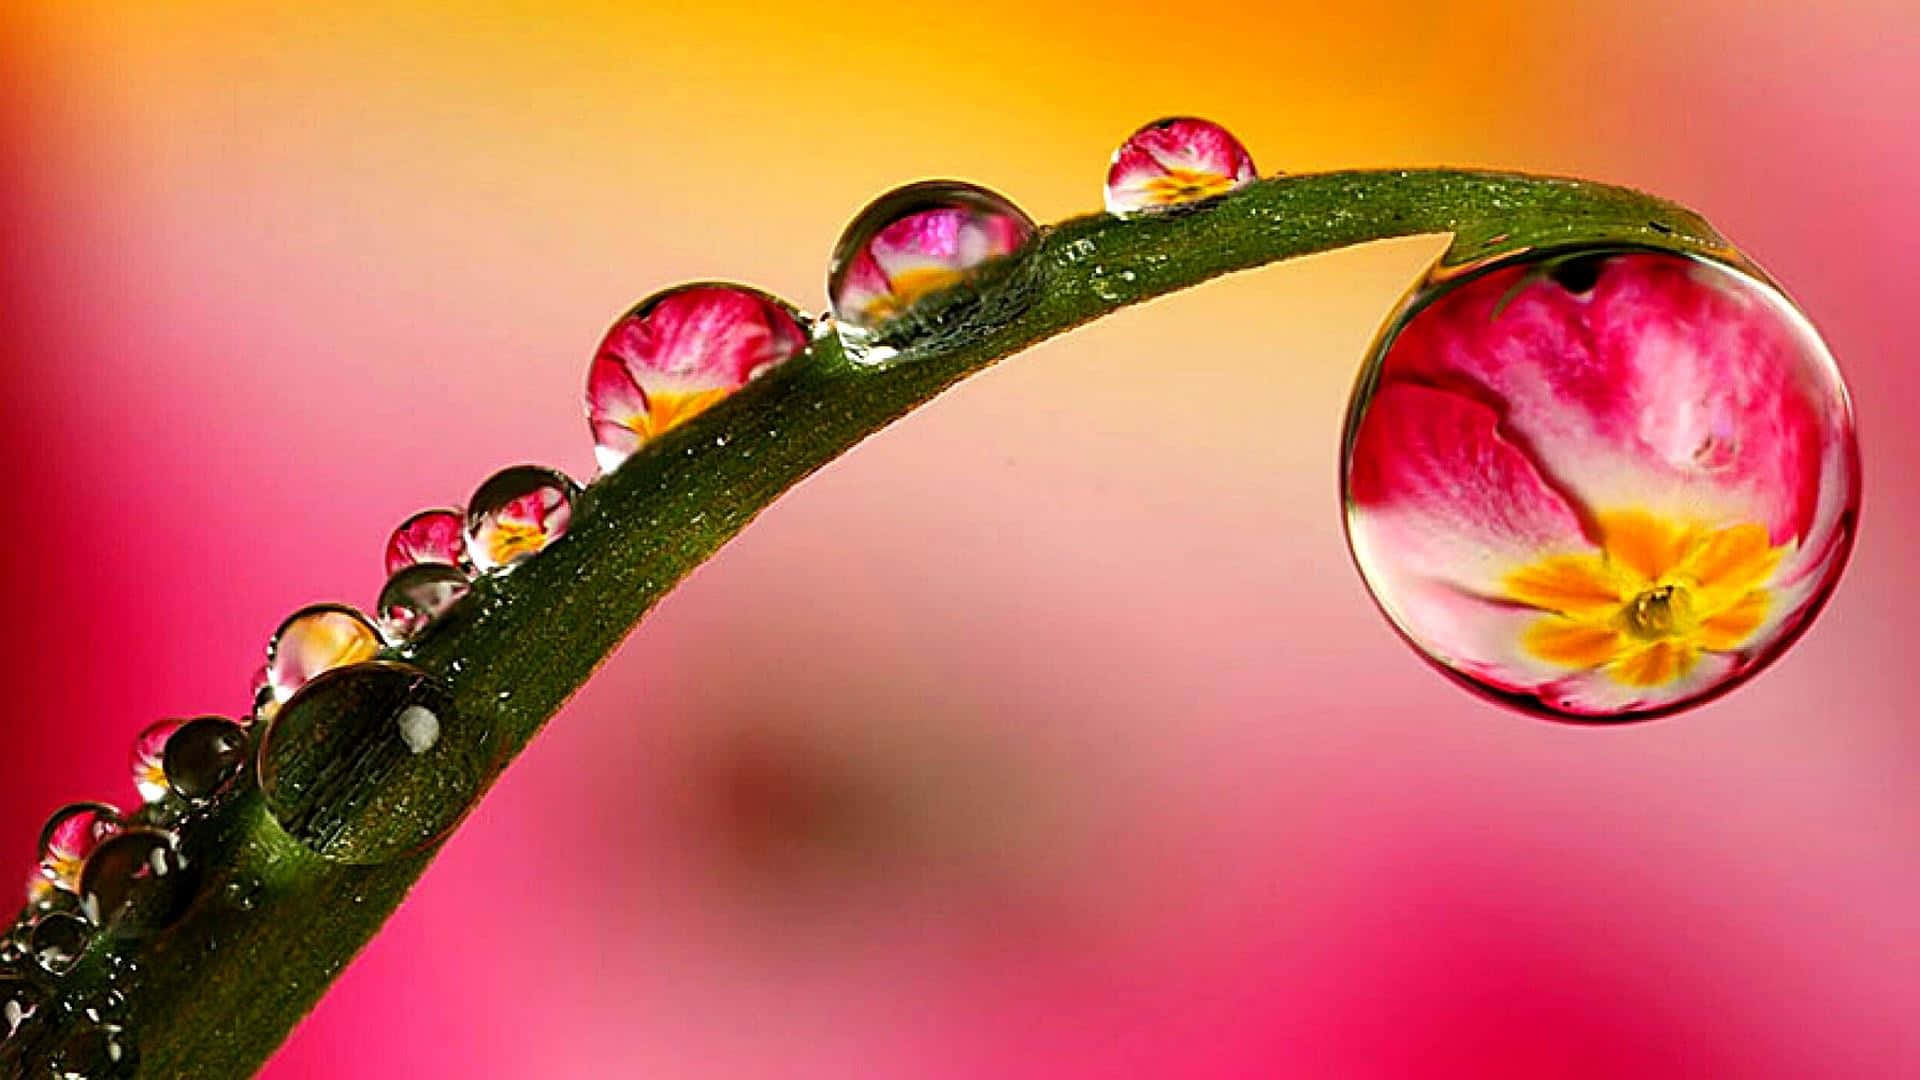
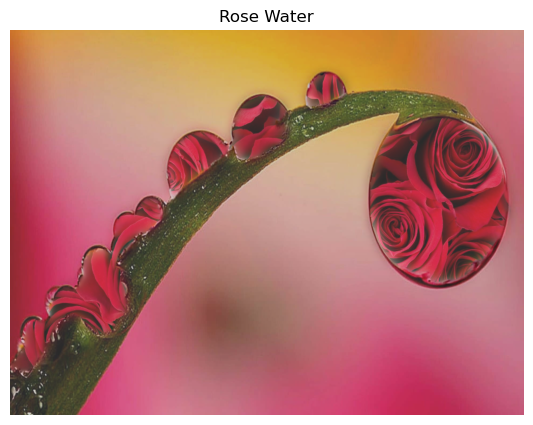
I then experimented with an irregular mask, blending an image of water droplets on a leaf with an image of roses. Using the mask, I made each water droplet contain part of the rose image. The result was a visually striking effect, where the droplets appeared as though they were filled with roses. I think this is what true "rose water" should look like!

Irregular Mask Results Irregular Mask Results
Irregular Mask Results Irregular Mask Results Irregular Mask Results