CS 180 Project 5 - Fun With Diffusion Models! by Eshani Jha

Overview

In this project, I will implement and deploy diffusion models for image generation, exploring their potential for creating high-quality, realistic visuals. The project is divided into two distinct parts, each with its own set of goals and deadlines (detailed below). This step-by-step approach will ensure a comprehensive understanding of diffusion-based generative modeling techniques.

Setup

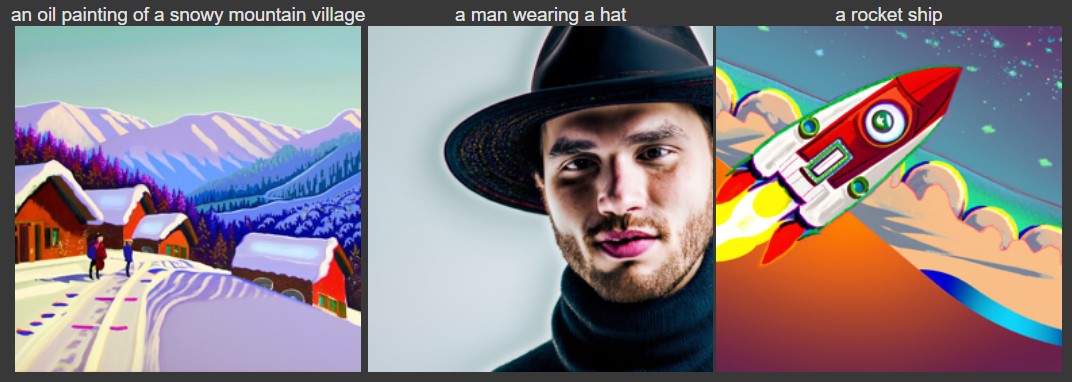
Using DeepFloyd's Stage 1 function, I generated images from text prompts, followed by applying Stage 2 for super-resolution to enhance the output quality. My selected seed was 180, ensuring reproducibility across all experiments. The prompts I used were:

To evaluate the effect of inference steps on image quality, I tested with 5, 20, and 50 steps. Unsurprisingly, 50 inference steps produced the best results, showcasing fine details and higher fidelity to the prompts. Among the outputs, the "rocket ship" prompt was the most creative, generating imaginative and visually striking results. While the model generally aligns well with the prompts, occasional discrepancies highlight its limitations, particularly for simpler or abstract concepts.
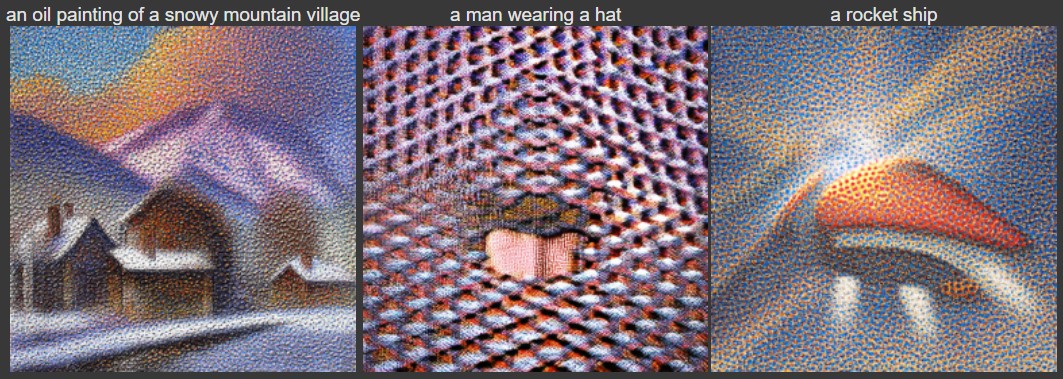
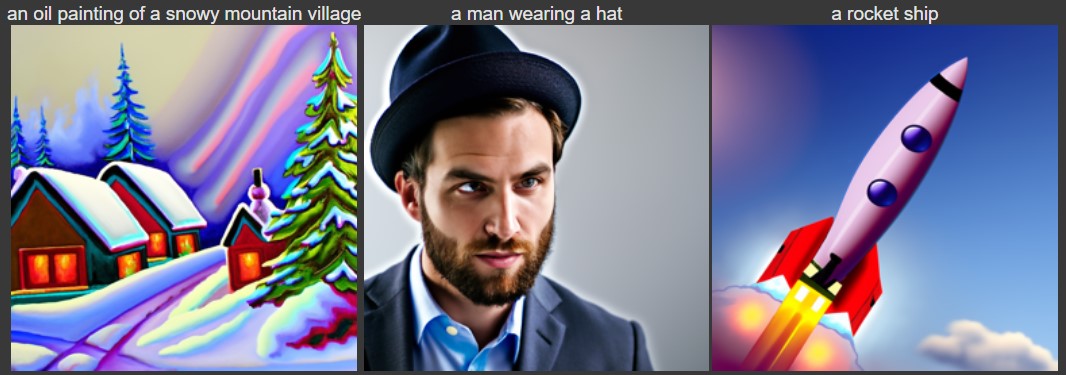
Image 1 Image 2 Image 3

1.1 Implementing the Forward Process

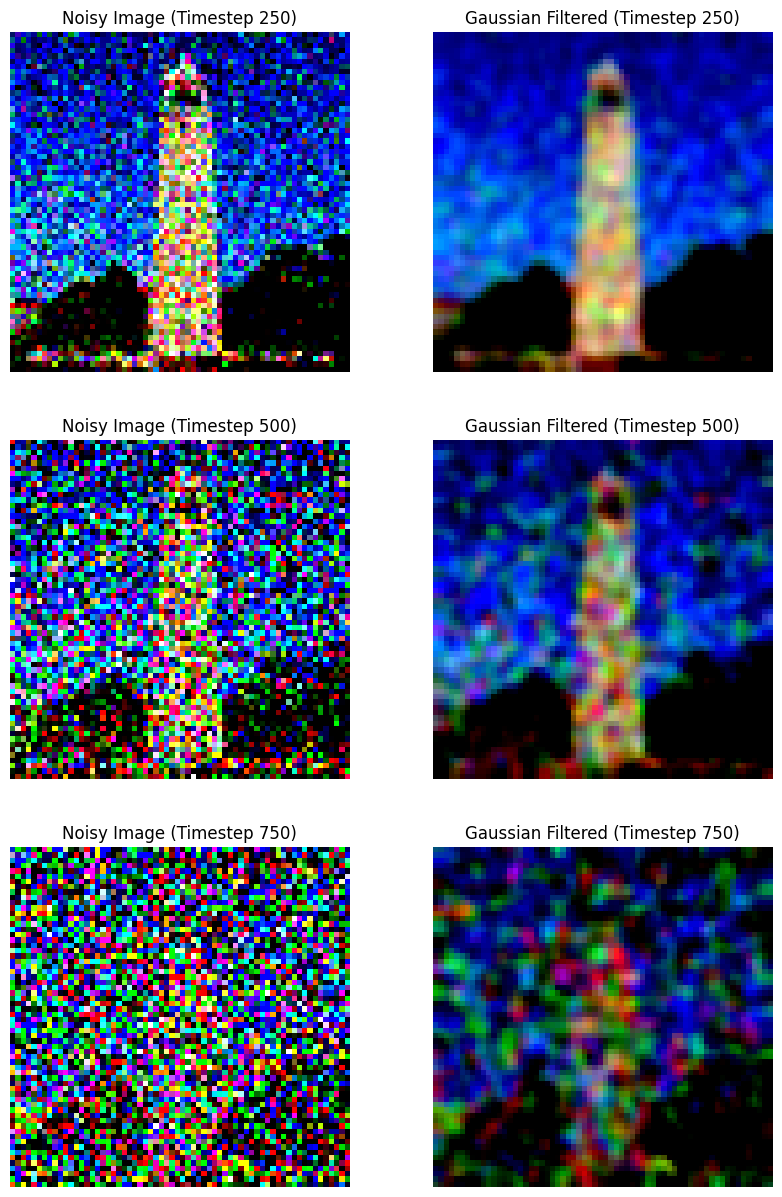
To implement the forward process, we created a function to add noise to an image while adhering to DeepFloyd’s pre-trained model constraints: a non-linear noise schedule (defined by alphas_cumprod) and 1000 discrete training steps (t-values ranging from 0 to 999). Below are the results of the forward function at various noise levels (t = 250, t = 500, t = 750).

Points

1.2 Classical Denonising

Before turning to advanced methods, we first explored classical denoising with Gaussian blur filters to remove noise from the images at timesteps t = 250, t = 500, and t = 750. While Gaussian filtering can reduce noise, it inevitably blurs finer details, making it insufficient for restoring the original image quality. By manually tuning kernel sizes and sigma values, we attempted to strike a balance between noise reduction and detail preservation, but the results were limited.

To counteract the loss of detail, we applied sharpening filters (as explored in Project 2) by subtracting one Gaussian level from another and adding the sharpness back to the original image. However, this could not recover lost information, underscoring the limitations of classical approaches in handling such noise. Creative digital techniques will be explored further in the next section.

noise

1.3 Diffusion One-Step Denoising

In this section, we used a pretrained diffusion model to perform one-step denoising, leveraging a UNet trained on a massive dataset of image pairs \((x_0, x_t)\). The model estimates the noise in a noisy image conditioned on a text prompt embedding (e.g., "a high quality photo") and timestep \(t\). By scaling and removing the predicted noise, we can approximate the original clean image.

Results for timesteps t = 250, t = 500, and t = 750 show that the model performs well for low-noise images but struggles with higher noise levels, resulting in blurrier outputs. While single-shot denoising is effective, its limitations highlight the need for iterative noise reduction, which we will explore in the next section.
Results

Image 1 Image 2 Image 3

1.4 Iterative Diffusion Denoising

In this section, I implemented iterative diffusion denoising, breaking the process into multiple steps to progressively refine the image. Unlike the single-step approach, iterative denoising encourages the model to focus on coarse-to-fine details, restoring more intricate features over time. For example, the foliage in the background of the Campanile image showed significantly improved definition compared to other methods.

I compared three approaches: iterative diffusion, single-step diffusion, and Gaussian blur denoising. The iterative approach consistently outperformed the others, producing sharper and more detailed results. Given that noise removes information, the iterative process “hallucinates” lost details, sometimes adding creative interpretations to the image. The results demonstrate the power of diffusion models when combined with incremental refinement.

Real-Life Results

Toy Panorama

1.5 Diffusion Model Sampling

In this section, I used the diffusion model to generate images from pure noise, effectively “hallucinating” visuals from scratch. By setting i_start = 0 and initializing with random noise, the iterative denoising process refined the noise into recognizable images. The results demonstrate how diffusion models can synthesize images purely from the latent manifold of the dataset.

I observed that lower strides (more iterative steps) produced richer, more detailed images, while higher strides often resulted in incomplete outputs, such as solid black or purple images. All generated samples were enhanced using super-resolution. Below are five examples of "a high quality photo" created through this process.

Results

Toy Panorama

1.6 Classifier-Free Guidance (CFG)

To enhance the controllability and quality of image generation, I implemented Classifier-Free Guidance (CFG). This technique allows us to adjust the influence of the text prompt on the generated image by blending conditional and unconditional noise estimates. By scaling the difference between these estimates with a CFG scale, we can balance fidelity to the prompt against image diversity.

The most exciting aspect of CFG is the ability to push beyond the dataset's original manifold by using high CFG values, producing creative and otherworldly results. For example, at a CFG scale of 7, the generated images take on surreal and imaginative qualities. Below are five examples generated with CFG scales of 2 and 7, demonstrating the enhanced control and creativity unlocked by this approach.

Results

Toy Panorama

1.7 Image-to-Image Translation

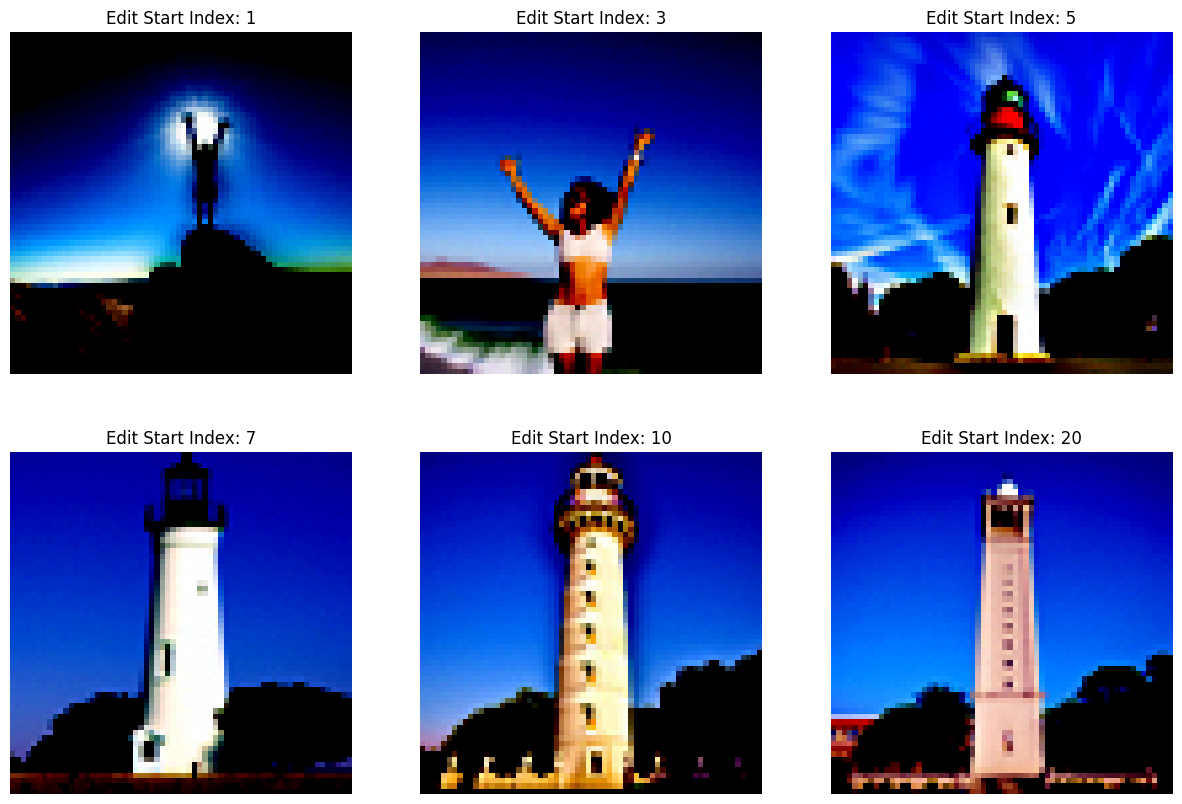
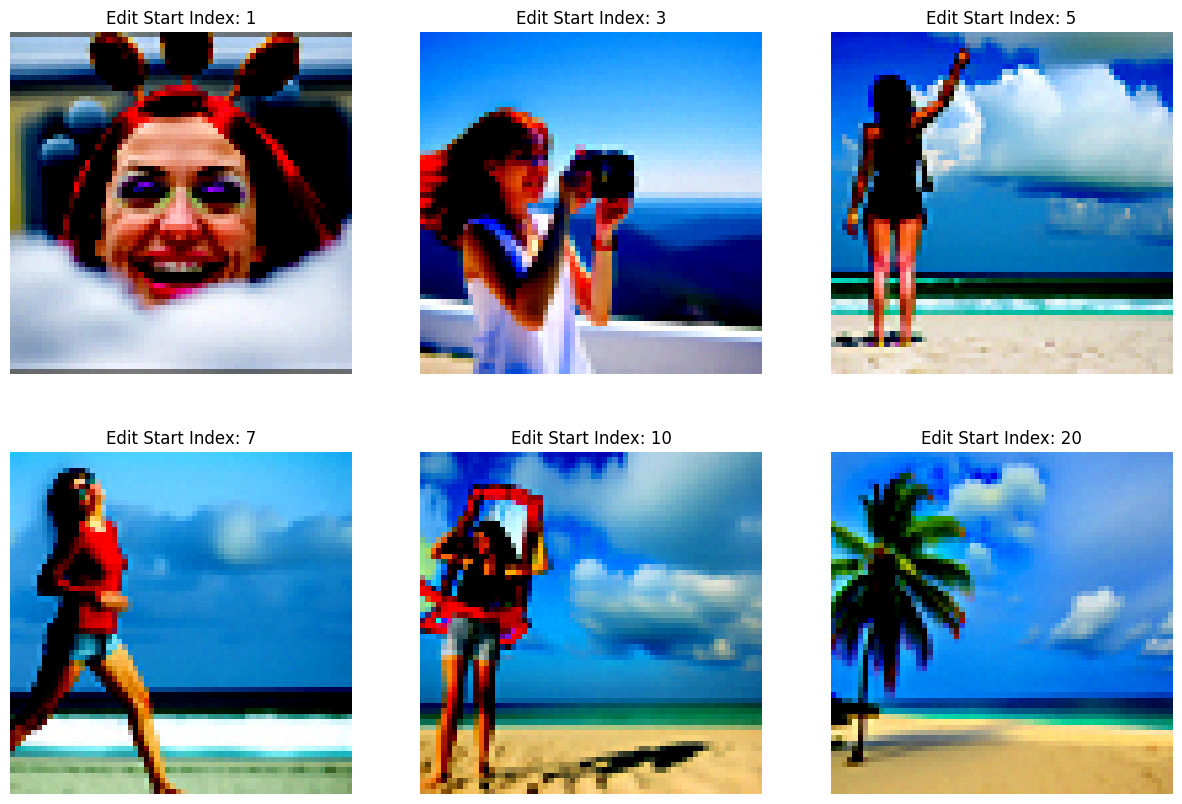
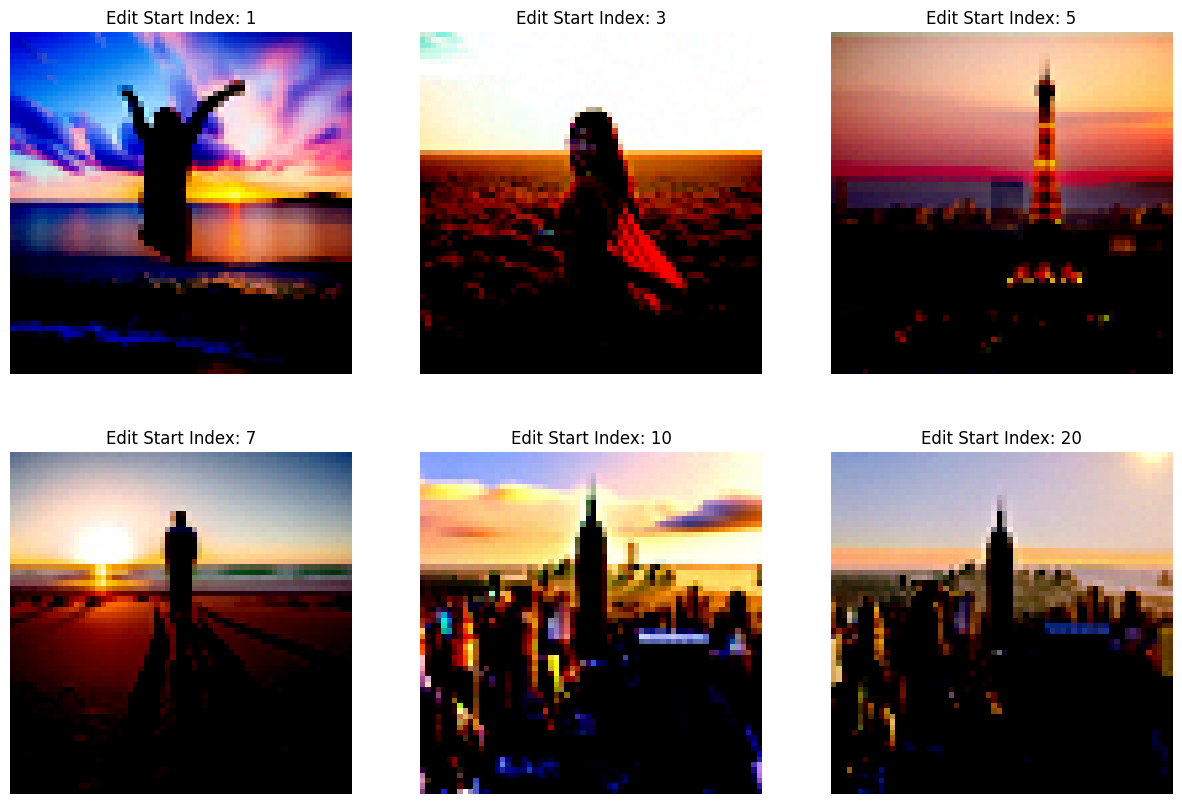
In this section, I applied the SDEdit algorithm to perform image-to-image translation, using the denoising process of diffusion models to make creative edits to existing images. Starting with a noisy version of the test image, I iteratively denoised it at different noise levels (i_start = [1, 3, 5, 7, 10, 20]) with the text prompt "a high quality photo." The results show progressively more refined edits, with lower noise levels retaining more original features and higher noise levels producing larger transformations.

In addition to the test image, I experimented with two of my own images: a beach scene and a skyscraper. Using the same procedure, I observed similar patterns of transformation, where the model gradually blended creative details into the original images. The flexibility of this approach highlights the potential of diffusion models for controlled and imaginative edits.

Results

Image 1 Image 2 Image 3

1.7.1 Editing Hand-Drawn and Web Images

This section explores how diffusion models can project non-realistic images, such as hand-drawn sketches or web-sourced illustrations, onto the natural image manifold. Using the same iterative denoising process as before, I experimented with a downloaded image of an octopus and two hand-drawn sketches: a flower and a house. Noise levels of i_start = [1, 3, 5, 7, 10, 20] were applied to observe the gradual transformation from noisy inputs to refined outputs.

For the octopus image, the model successfully enhanced realism with each step, adding textures and lifelike details. The hand-drawn flower and house images showed varying levels of success, with the flower achieving a more natural appearance, while the house introduced creative interpretations. These results highlight the versatility of diffusion models in transforming non-realistic inputs into more polished outputs.

Results

Image 1 Image 2 Image 3

1.7.2 Inpainting

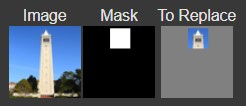
In this section, I explored the powerful inpainting capabilities of diffusion models, where missing or masked areas of an image are seamlessly filled based on the surrounding context. Using a mask, the model selectively preserves unmasked areas while iteratively hallucinating new content in the masked regions, effectively integrating them into the original image.

I applied inpainting to three images: the Campanile, a beach scene, and the Manhattan skyline. For the Campanile, I masked the top portion of the tower, and the model successfully reconstructed it while blending it naturally with the existing structure. In the beach and Manhattan skyline images, the inpainting process creatively restored missing areas, producing results that aligned convincingly with the original content. These experiments highlight the versatility and robustness of diffusion-based inpainting.

Results

Image 1 Image 2 Image 3 Image 4

1.7.3 Text-Conditional Image-to-Image Translation

In this section, I explored text-conditional image-to-image translation, combining the structure of an input image with the creativity of a text prompt. By varying noise levels (i_start = [1, 3, 5, 7, 10, 20]), the model interpolates between the input image and the text prompt, blending features from both. Higher noise levels allow the model to move closer to the text prompt's "location" in the latent space, while lower noise levels retain more of the original image.

I experimented with three combinations: the Campanile paired with the prompt "a rocket ship," a beach scene paired with "a pencil," and the Manhattan skyline paired with "a photo of a dog." The results show creative transformations, with the Campanile gradually morphing into a futuristic rocket ship, the beach taking on artistic pencil-like textures, and the skyline blending cat-like features into its structure. These experiments highlight the versatility and control offered by text-conditional diffusion models.

Results

Image 1 Image 2 Image 3

1.8 Visual Anagrams

In this section, I created visual anagrams—images that appear as one subject when viewed normally and transform into another subject when flipped upside down. Using diffusion models, I combined two prompts by denoising the image with one prompt, flipping the image, denoising it with the second prompt, and averaging the two noise estimates. This process generates a single image that reveals two distinct interpretations based on orientation.

I experimented with three visual anagrams:

  • Prompt 1: "An oil painting of an old man" and Prompt 2: "An oil painting of people around a campfire"
  • Prompt 1: "A photo of a hipster barista" and Prompt 2: "A rocket ship"
  • Prompt 1: "An oil painting of a snowy mountain village" and Prompt 2: "A lithograph of a skull"
The results were striking, with each image seamlessly transitioning between the two prompts when flipped, showcasing the creative potential of diffusion models for optical illusions.

Results

Image 1 Row 1 Image 2 Row 1
Image 1 Row 2 Image 2 Row 2
Image 1 Row 3 Image 2 Row 3

1.9 Hybrid Images

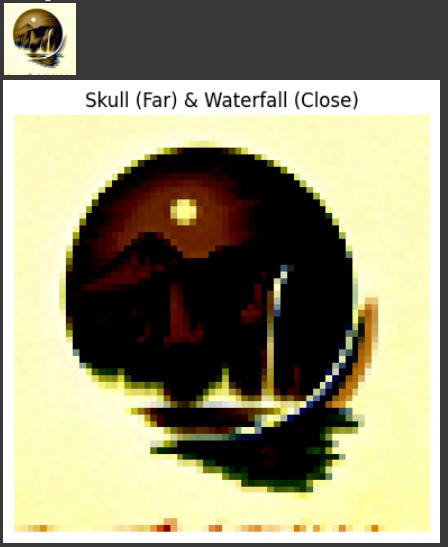
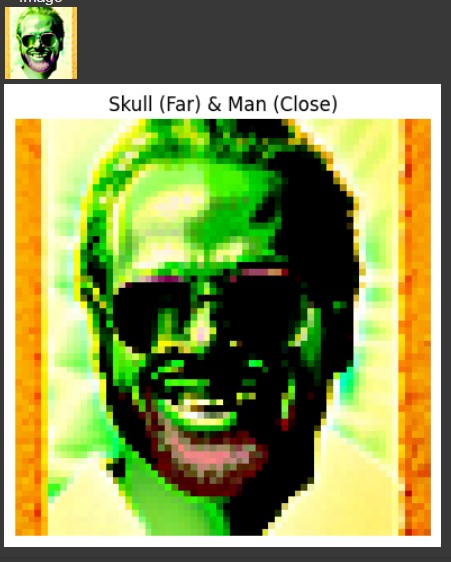
In this section, I implemented Factorized Diffusion to create hybrid images that combine two distinct subjects by blending their frequency components. The process involves generating two noise estimates using different text prompts, applying low-pass and high-pass filters to separate their frequency components, and combining the low frequencies from one with the high frequencies from the other. This technique results in images that appear as one subject from afar but transform into another up close.

I created three hybrid images using this method:

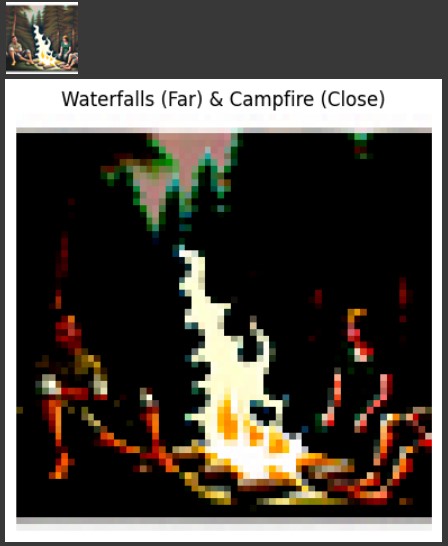
  • Hybrid 1: "A lithograph of a skull" (low frequencies) and "A lithograph of waterfalls" (high frequencies)
  • Hybrid 2: "A lithograph of waterfalls" (low frequencies) and "An oil painting of people around a campfire" (high frequencies)
  • Hybrid 3: "A lithograph of a skull" (low frequencies) and "A photo of a man" (high frequencies)
The results showcase seamless blending, with each hybrid image transitioning between two distinct interpretations depending on viewing distance. This experiment highlights the versatility of diffusion models in creating visually compelling and conceptually rich outputs.

Results

Image 1 Image 2 Image 3

5B - Part 1: Training a Single-Step Denoising U-Net

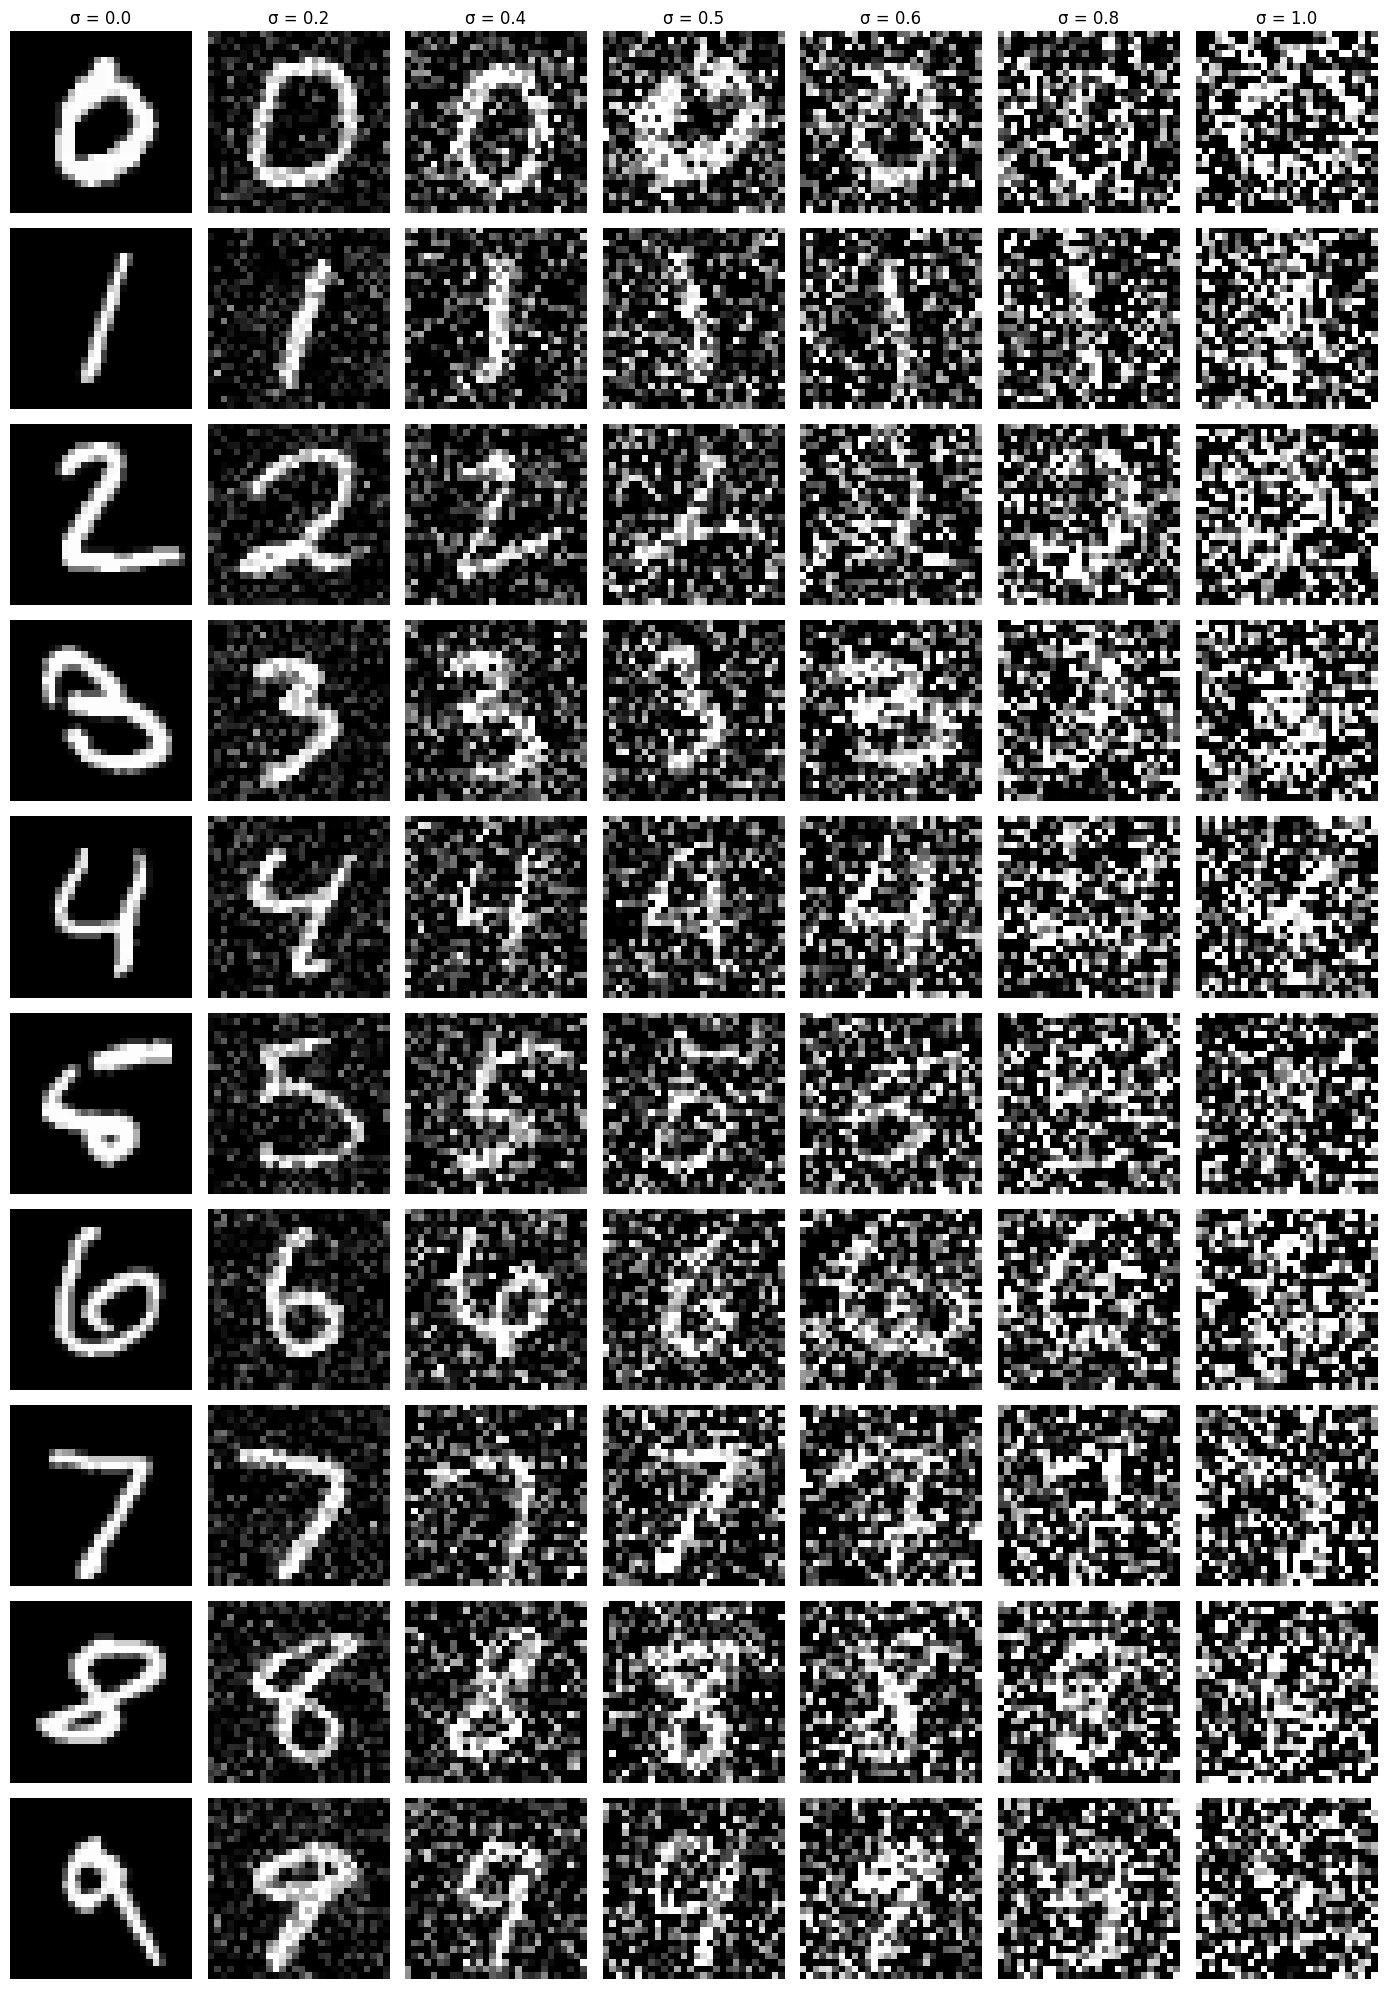
The first step in this project involved building a simple one-step denoiser. The objective is to train a UNet-based model to map a noisy image \(x_t\) to its clean counterpart \(x_0\) by minimizing an L2 loss:

The UNet architecture used here features downsampling and upsampling blocks with skip connections to retain spatial details during the denoising process. The primary operations include:

To deepen the network, composed operations like ConvBlock, DownBlock, and UpBlock were used. These include additional learnable parameters for enhanced performance while maintaining input-output shape consistency. This UNet serves as the foundation for our single-step denoising tasks.

Results

Image 1

1.2 Using the UNet to Train a Denoiser

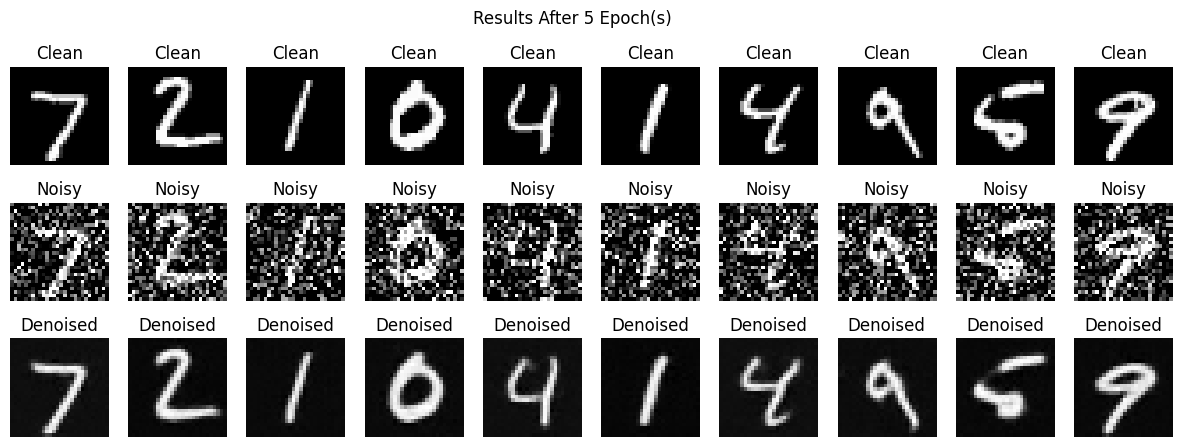
The objective was to train the UNet denoiser to restore clean images from noisy inputs, using the MNIST dataset. Each image batch was noised dynamically during training, ensuring the network saw new variations with every epoch for better generalization. Key training details include:

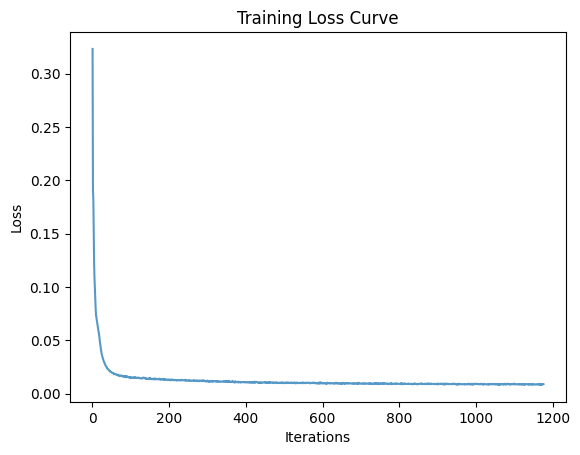
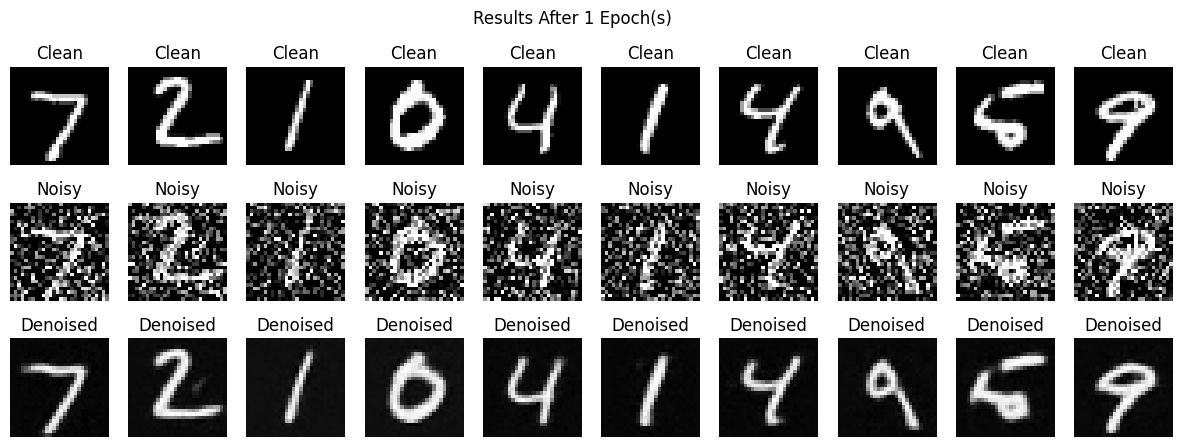
I visualized the training process with a loss curve and evaluated denoised outputs after the 1st and 5th epochs. As expected, the results showed significant improvements after 5 epochs, with cleaner reconstructions of the noisy test digits.

Results

Image 1 Image 1

First epoch.

Image 1 p> Fifth epoch.

5B - Part 2: Training a Diffusion Model

In this part, I adapted the U-Net to predict the noise added to an image rather than directly performing denoising. This shift enables iterative denoising, which is more effective than one-step methods. Additionally, I introduced time-conditioning by including the timestep of the diffusion process as input to the U-Net. This allows the model to adapt its predictions based on the current noise level during the iterative denoising process.

Training Process

To train the time-conditioned U-Net:

This approach ensures the model is robust across all noise levels, making it capable of iteratively refining noisy inputs.

Sampling from the Model

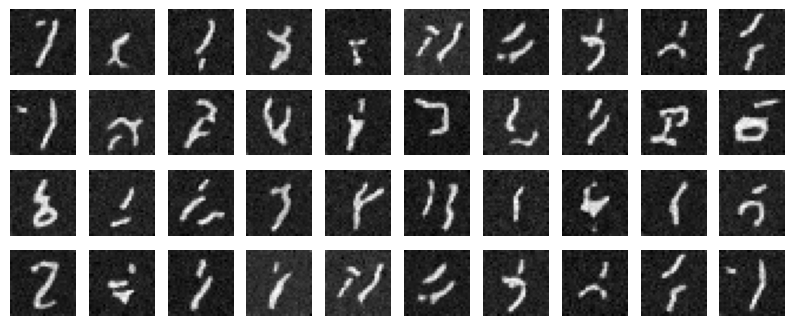
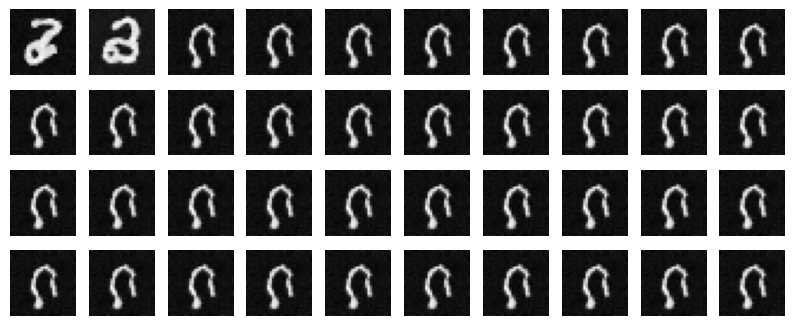
To sample clean images, I used the iterative denoising algorithm starting with pure noise. Over multiple steps, the model gradually removed noise, reconstructing high-quality images. These results highlight the effectiveness of time-conditioned noise prediction in generating clean images from noisy inputs.

Results

Image 1 Image 1